


When hanging a frameless mirror without any mounting hardware, you’re left with using adhesive / mastic that is mirror compliant. The Henkel Corporation has two products that will work, LOCTITE PL Mirror Adhesive, and the very commonly found Loctite PL Premium. NOTE: The PL Premium is a multi-surface adhesive, which includes mirrors. The PL 520 is solvent-based, and due to the associated odors, cannot be used by people with chemical sensitivities or other health issues – Henkel Customer Service
If the Loctite brand mirror adhesive is not available locally, you can order online or try another brand that is stocked locally. Mirror adhesive can be found in the caulk and adhesive section and / or bath section where mirrors are located.
Note: Using a non-specific mirror adhesive could erode the mirror backing and show through as black specs on the glass.
* For larger mirrors beyond the standard single vanity sizes shown; use Mirror Hanger Bracketsor Full Length J- Channels as additional support on bottom edge of mirror.
Tools Needed
- Pencil
- Level
- Measuring tape
- China Marker / Grease Pencil and / or Soapstone Marker (i) These can easily be wiped off washable painted walls, mirrors, glass tiles, and stone surfaces. (ii) The soapstone marker is white and may be hard to see on white walls, but with enough rubbing you can create a visible chalky area. (iii) Markers can be found at any local store in the school supply section, or local craft store.
- Blue painters tape; preferably 2″ or wider. Use wherever marks need to be made without marking the surfaces.
- Mirror Tape (optional)
Square or Rectangle Frameless Mirror Installation
- Locate bottom and center location on wall for mirror placement. (i) If using painters tape, allow room when placing mirror on wall, so it doesn’t get trapped underneath.
- Measure horizontal dimensions of mirror and make a vertical center mark. (i) China Marker / grease pencil, soapstone marker, or crayon are easily cleaned from glass.
- Clean back of mirror with rubbing alcohol for best adhesion.
- Apply adhesive / mastic on back of mirror. (i) Follow manufacturers product instructions. (ii) Be sure to keep a safe distance from mirror edges so excess doesn’t squeeze out from the edges. (iii) The use of mirror tape can be used to supplement mirror adhesive, helping hold the mirror while the adhesive cures. Mirror tape can be found in mirror section, along with mastic. Note: Adhesive backed double-sided tape is only a temporary assistant. Mirror tape is not a permanent and safe solution on its own.
- Carefully place mirror on wall…line up the bottom center marks created above…gently press against wall…use a level for alignment…fully press mirror against wall once level.
Tip: Tilt top of mirror forward when aligning to minimize adhesive and wall contact. (i) As per manufacturers instructions avoid breaking mirror mastic bond.

Oval & Circular Mirror Installation – Finding Centers
The following steps will ensure a perfectly aligned oval and circular shaped mirror.
Oval Mirror
- Lay mirror on a flat surface – mirror side up.
- Using painters tape (the wider the better), mask horizontally and vertically through the middle. This doesn’t have to be exact. Optional: mark glass direct with a china marker / grease pencil, soapstone marker, or crayon. All are easily cleaned from glass.
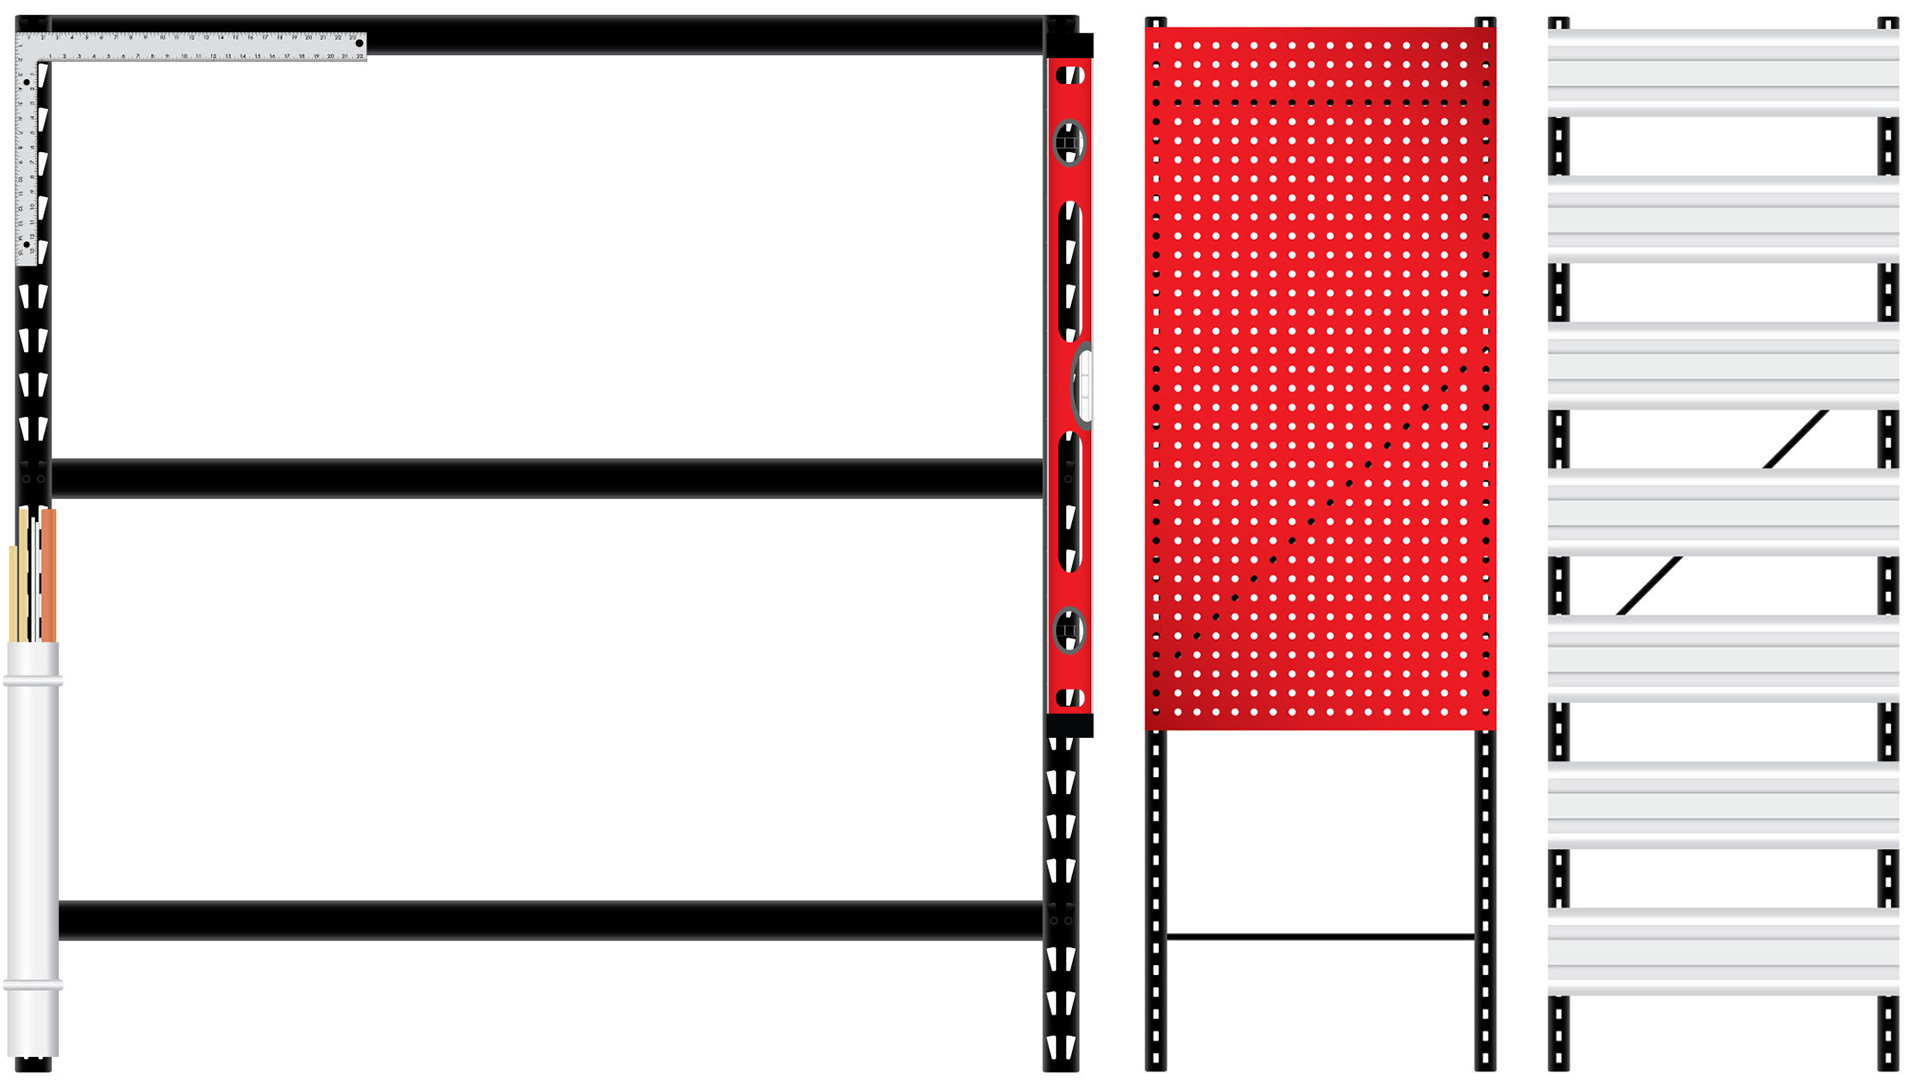
- Using a builders square; press it against either a bottom edge and side edge; then vice versa (as shown).
- Using the overall dimensions of the mirror (e.g. 22×30), make marks midway of the length and width. (i) To make sure the builders square is measuring accurately; as you could just spin on the oval and not be square; is to measure the gap below and above center in equal amounts. e.g. find 15″ and go 3″ above and below (18″ & 12″). The gap from the square to mirror edge should read the same. Keep rotating the square on the mirror edge until these measurements equal out. (ii) Using a flat edge or level, connect the points by drawing a straight line.
You now have a perfectly squared mirror to hang level. The lines can provide an accurate location to measure the left, right, top, and bottom from the center.

Circular Mirror
- Lay mirror on a flat surface – mirror side up.
- Using a builders square; press it against the bottom and side edge.
- Using the overall dimensions of the mirror (e.g. 24″), make a small vertical center mark on the bottom half of the mirror. (a) Mark glass direct with a china marker / grease pencil, soapstone marker, or crayon. All are easily cleaned from glass. (i) Use painters tape if none of the above are available. (ii) Unlike an oval mirror, there is no worry of a circular mirror being angled, so a simple center mark to align on the wall center mark is all that is needed.

Oval & Circular Mirror Installation
- Locate bottom and center location on wall for mirror placement. (i) If using painters tape, allow room when placing mirror on wall, so it doesn’t get trapped underneath.
- Clean back of mirror with rubbing alcohol for best adhesion.
- Apply adhesive / mastic on back of mirror. (i) Follow manufacturers product instructions. (ii) Be sure to keep a safe distance from mirror edges so excess doesn’t squeeze out from the edges. (iii) The use of mirror tape can be used to supplement mirror adhesive, helping hold the mirror while the adhesive cures. Mirror tape can be found in mirror section, along with mastic. Note: Adhesive backed double-sided tape is only a temporary assistant. Mirror tape is not a permanent and safe solution on its own.
- Carefully place mirror on wall…line up the bottom center marks created above…gently press against wall…use a level for alignment…fully press mirror against wall once level. Tip: Tilt top of mirror forward when aligning to minimize adhesive and wall contact. (i) As per manufacturers instructions avoid breaking mirror mastic bond.

Notes
- Mirror adhesive is a more permanent solution compared to mirror clips or brackets. If ever wanting to remove mirror from wall, the drywall surface will be damaged when pulling apart.
- Tiles or any other harder surface may be saved with slow and careful removal, but not guaranteed. The mirror will most likely need to be replaced as well. An option is scraping the adhesive off the back of the mirror with a putty knife or scraper, but fragments of the mirror backing material may be removed during the process.
- When trying to remove and save a mirror, a putty knife works well. A pry bar has too thick of edges and will chip the glass.